Serving a static site from S3 using Cloudflare Full SSL
Hosting static sites on S3 is fairly common practice. This blog, for example, is built using eleventy and is pushed to an AWS S3 bucket using a Github action on commit-to-master. AWS has walk through guides, and s3 very nearly supports static sites out of the box. This is remarkable as AWS is a far cry from user friendly in terms of UX. Ordinarily you need to piece many bits of information together from AWS's documentation to get something specific done.
In setting up the blog for Chinwag I encountered a problem. The static site URL generated by S3 was http only. That meant that the Cloudflare "Full SSL" setting wouldn't work, as the second leg (Cloudflare -> origin) would need to be unencrypted. This is not ideal as the setting would apply globally, including for more sensitive traffic to other origins. This blog post gives a quick overview of how to set up the S3 static site such that you can use the Full SSL setting with Cloudflare.
Assumptions #
- You use Cloudflare for DNS
- You have followed the static site set up guide by Cloudflare
- After following the guide if you navigate to your static site url (e.g.
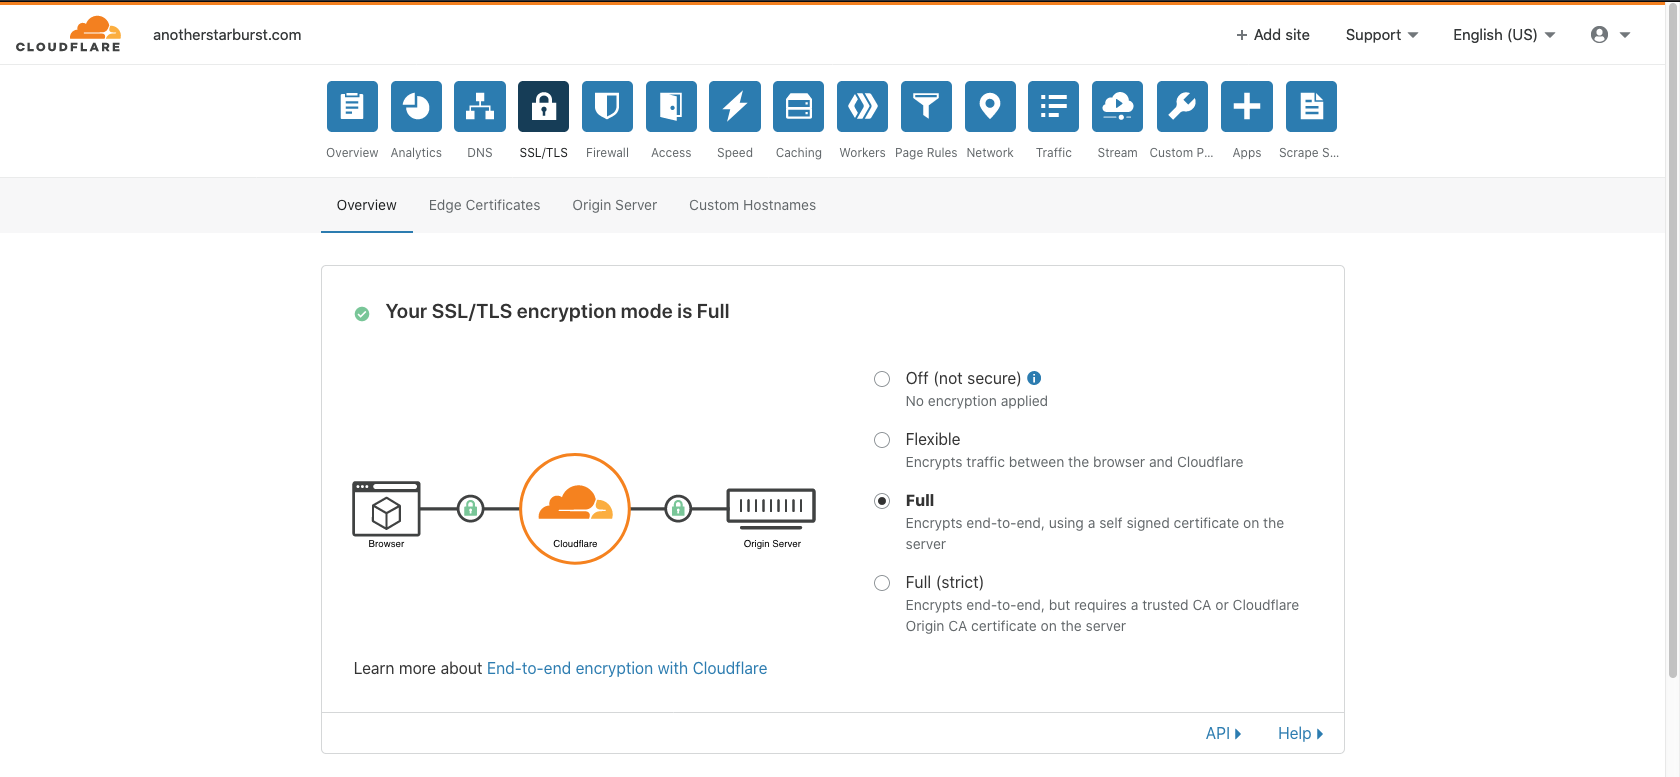
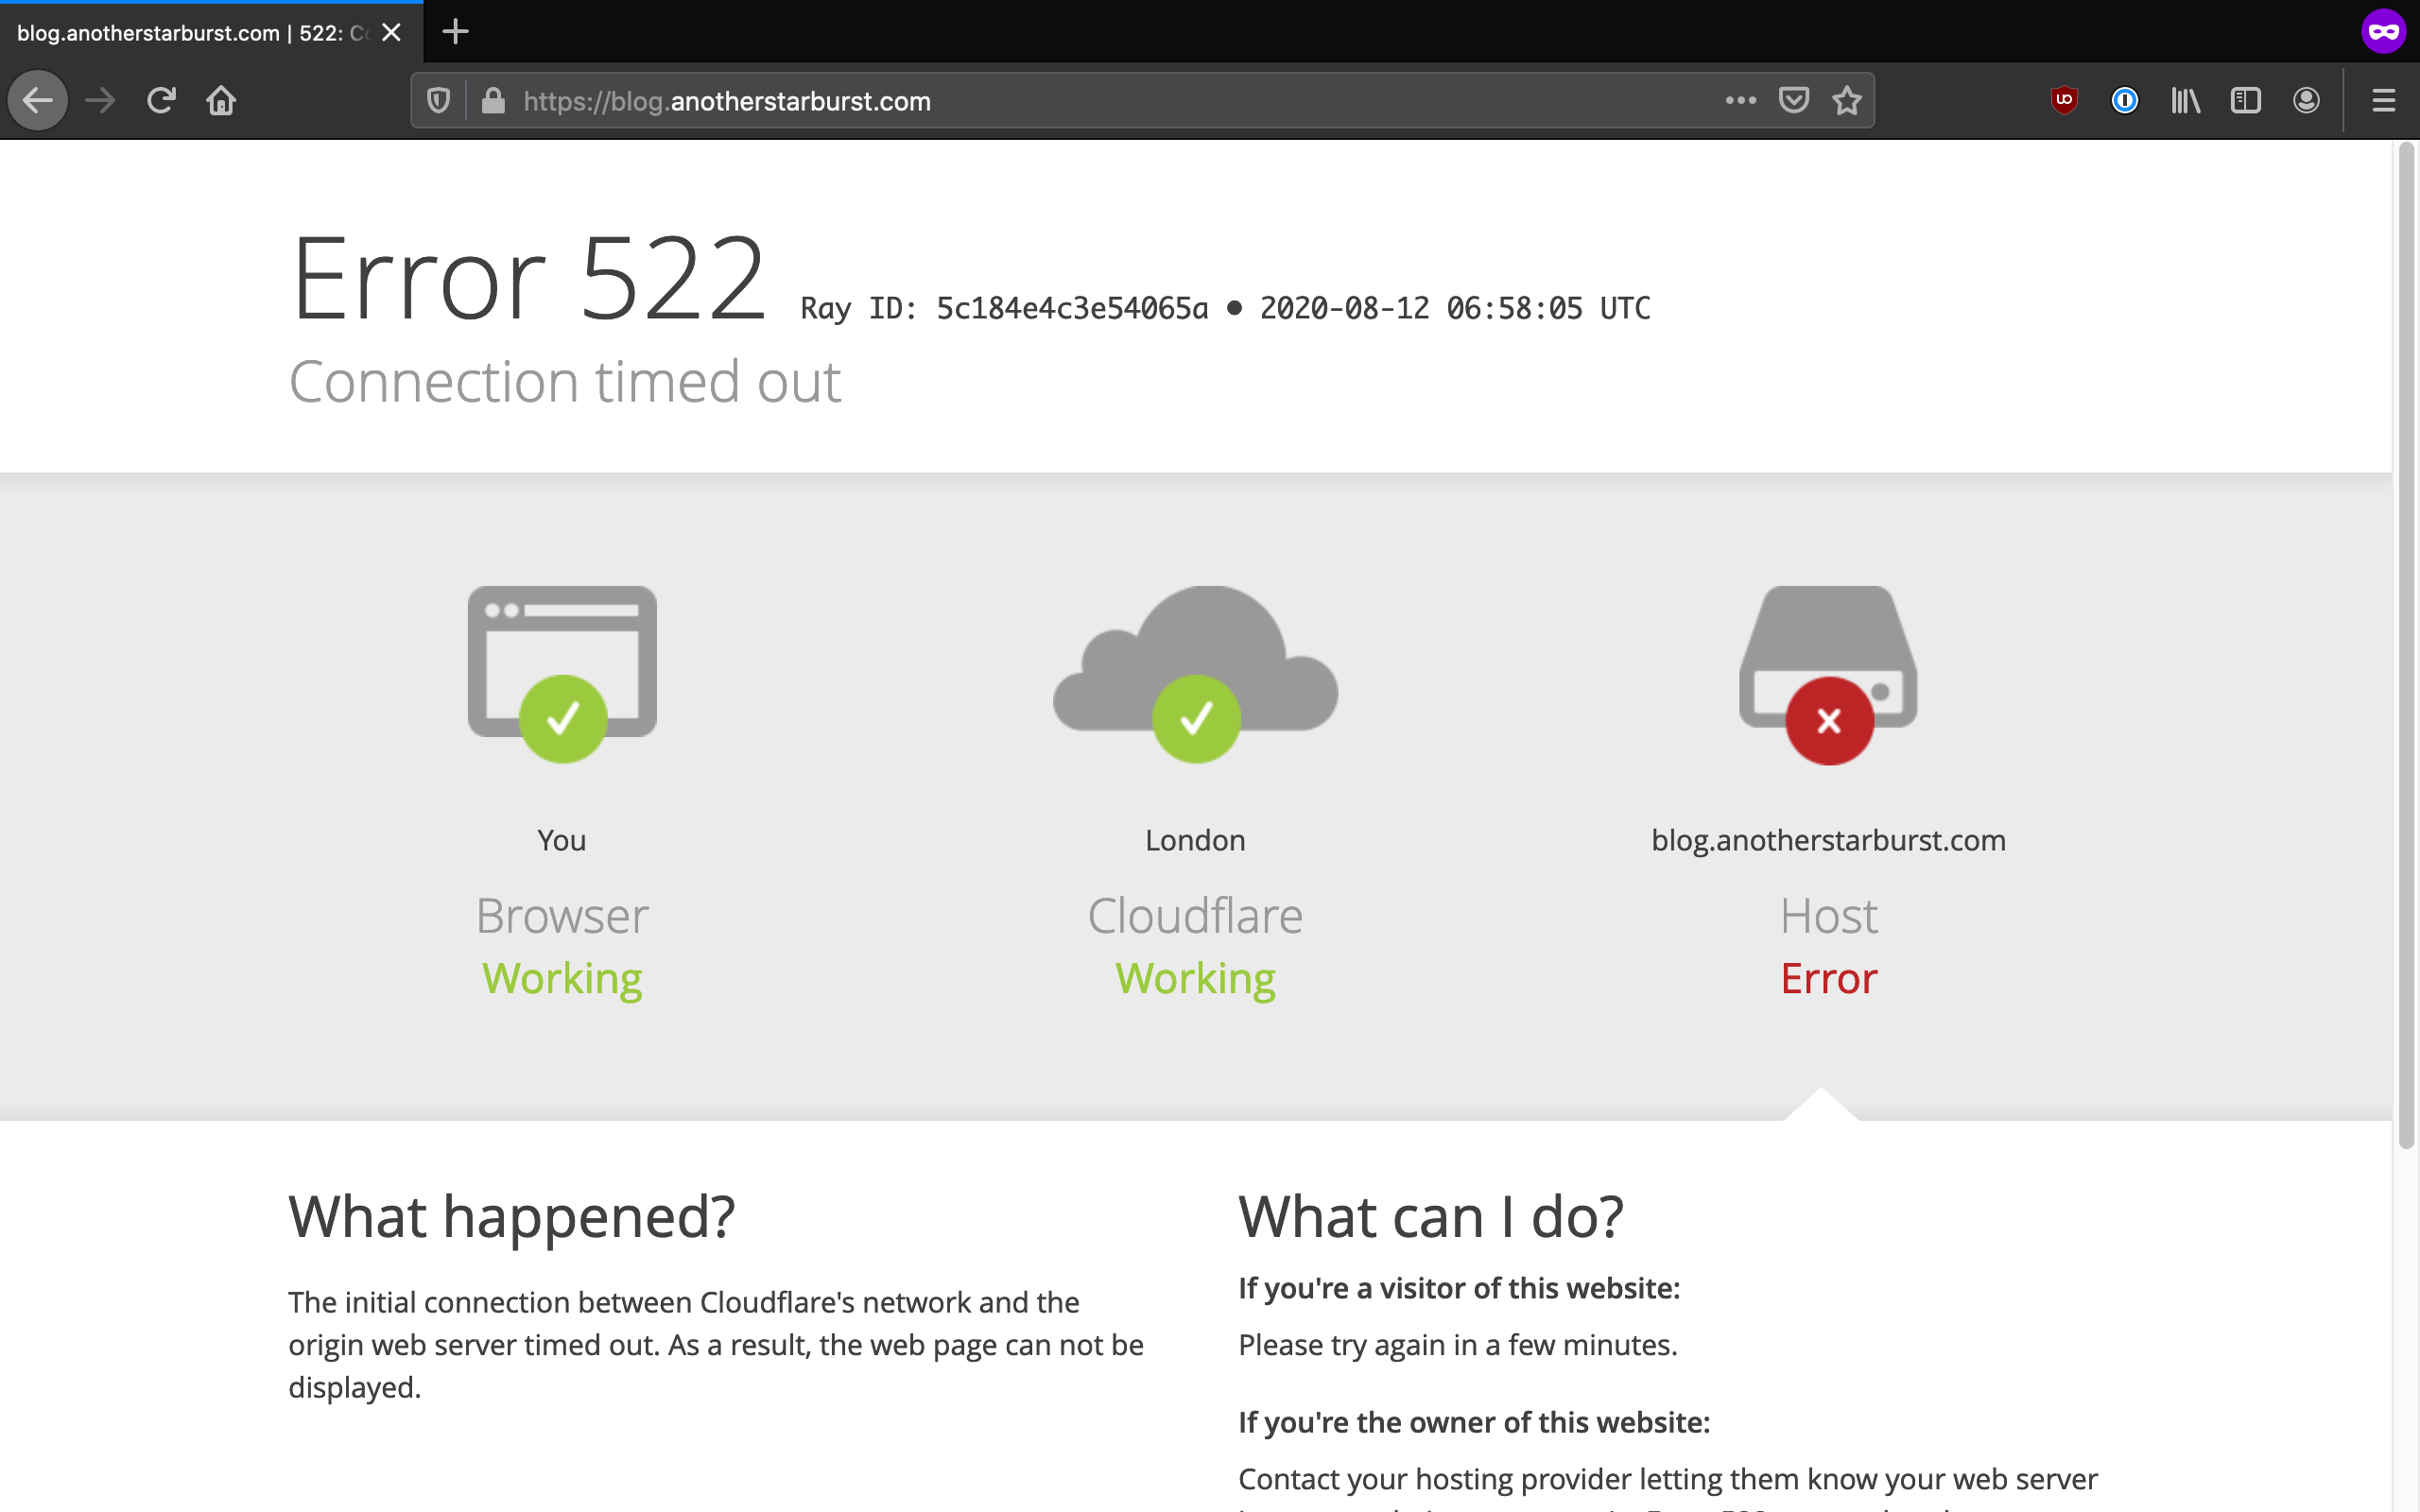
https://blog.example.com) it works if you have the SSL/TLS encryption mode set to "Flexible". If you set it to "Full SSL" you get a Cloudflare 522 error after a long wait.
Getting to Full SSL #
The step you need to take is to set up Cloudfront such that it serves your static site over SSL. The CNAME value in Cloudflare should then take said Cloudfront URL. The remainder of this blog will walk you through that process as it took me some time to figure out.
For the purposes of this we're assuming that your site is going to be hosted at https://blog.example.com.
Step 1: create a certificate #
⚠️ Change your region to us-east-1 for this certificate generation. The certificate will not be accessible by Cloudfront otherwise.
Navigate to the AWS Certificate Manager and provision a public SSL certificate suitable for your domain / subdomain. I recommend DNS validation if you've not got an email set up, as you can just pop the CNAME key/value into Cloudflare. It'll take a little while for the certificate to be issued (consistently less than an hour for me).
Step 2: set up Cloudfront to serve your static site #
With the certificate issued follow the AWS docs for setting up Cloudfront to serve a static site from s3. You want to follow the instructions for "Using a website endpoint as the origin, with anonymous (public) access allowed." Before you click "create" follow these steps:
- "Origin Domain Name": needs to be the URL that serves the current static website. I initially used the auto-complete options for this and ended up going around in circles for a while.
- "Viewer Protocol Policy": use "Redirect HTTP to HTTPS".
- "Cache Policy": I use Managed-CachingDisabled and cache at the edge using Cloudflare.
- "Alternate Domain Names": use the domain with subdomain you intend to serve this site from e.g.
blog.example.com. - "SSL Certificate": switch to Custom SSL Certificate and use the certificate you created earlier for your site e.g.
blog.example.com. - Once you click create it'll take a few minutes to deploy.
- When the state is "enabled" open up the distribution and copy the "Domain Name" - it'll look something like
0ukotd040z.cloudfront.net.
Step 3: Point Cloudflare at Cloudfront #
Follow these steps to use the Cloudfront URL in Cloudflare:
- Head to your domains DNS settings in Cloudflare.
- Click the CNAME record you set up for your static site during your initial configuration.
- Change the value (i.e. what was the original s3 URL) to the URL you just copied from Cloudfront e.g.
0ukotd040z.cloudfront.net. - Head over to the SSL/TLS settings, set the encryption mode to "Full" and load up your website (
https://blog.example.com).
Congratulations, your site should now load over https. I hope you use this knowledge to build great things :)